4 wooden pictures frames (I used 8x10 with about a 1.5" frame, matted to hold a 5x7 photo) $24.00
4 5x7 photos of you and your significant other $4.00
1 sheet of foam core $2.99
16 L brackets $3.53/20pk
24 screws (just long enough to secure the brackets without going through the frame) $2.99/20pk
2 sheets of white felt $2.00/6pk
1 fabric square (mine was 18x21 and I had to cut off the sides) $2.00
Stapler
Hand drill
Screwdriver (I highly recommend getting an electric one to fit in the tight spots)
Exacto knife (splurge on a good one, I got one for $1.98 and it was garbage)
Scissors
Pen
Ruler
Double-sided sticky squares or duct tape (to affix the bottom of the box to the L brackets)
Total cost (if you already have the stapler, drill, screwdriver etc, which we didn't) $41.50
I got the frames, photos, felt and fabric at Walmart, foam core at Michaels and brackets/screws at Rona.
1. Measure and pre-drill your pilot holes for the screws in the backs of the frames. We made our box slightly rectangular by placing a frame at either end and then the other two in between so the front/back sides and left/right sides had the same measurements.
2. Screw L brackets to the top and bottom of each frame and to the sides of the front/back sides (see below for pic of front frame) I highly recommend trying to find frames with flat backs. Ours had a slight lip on the sides which made screwing the sides on a little tricky


4. Place either the front or back frame face down and line up one of the side frames (make sure the pictures face the same direction!) to screw it together (make sure your table is completely free of anything that could scratch the frame...one of our frames got scratched and is now permanently the back frame)
5. Repeat with the other frames until you've created a box with brackets at the top and bottom to rest the top and bottom of the box on.

6. Measure the inside of the bottom of your box onto the sheet of foam core and cut out a piece to fit snugly inside. We stuck ours down with double-sided sticky squares from the hardware department in Walmart.
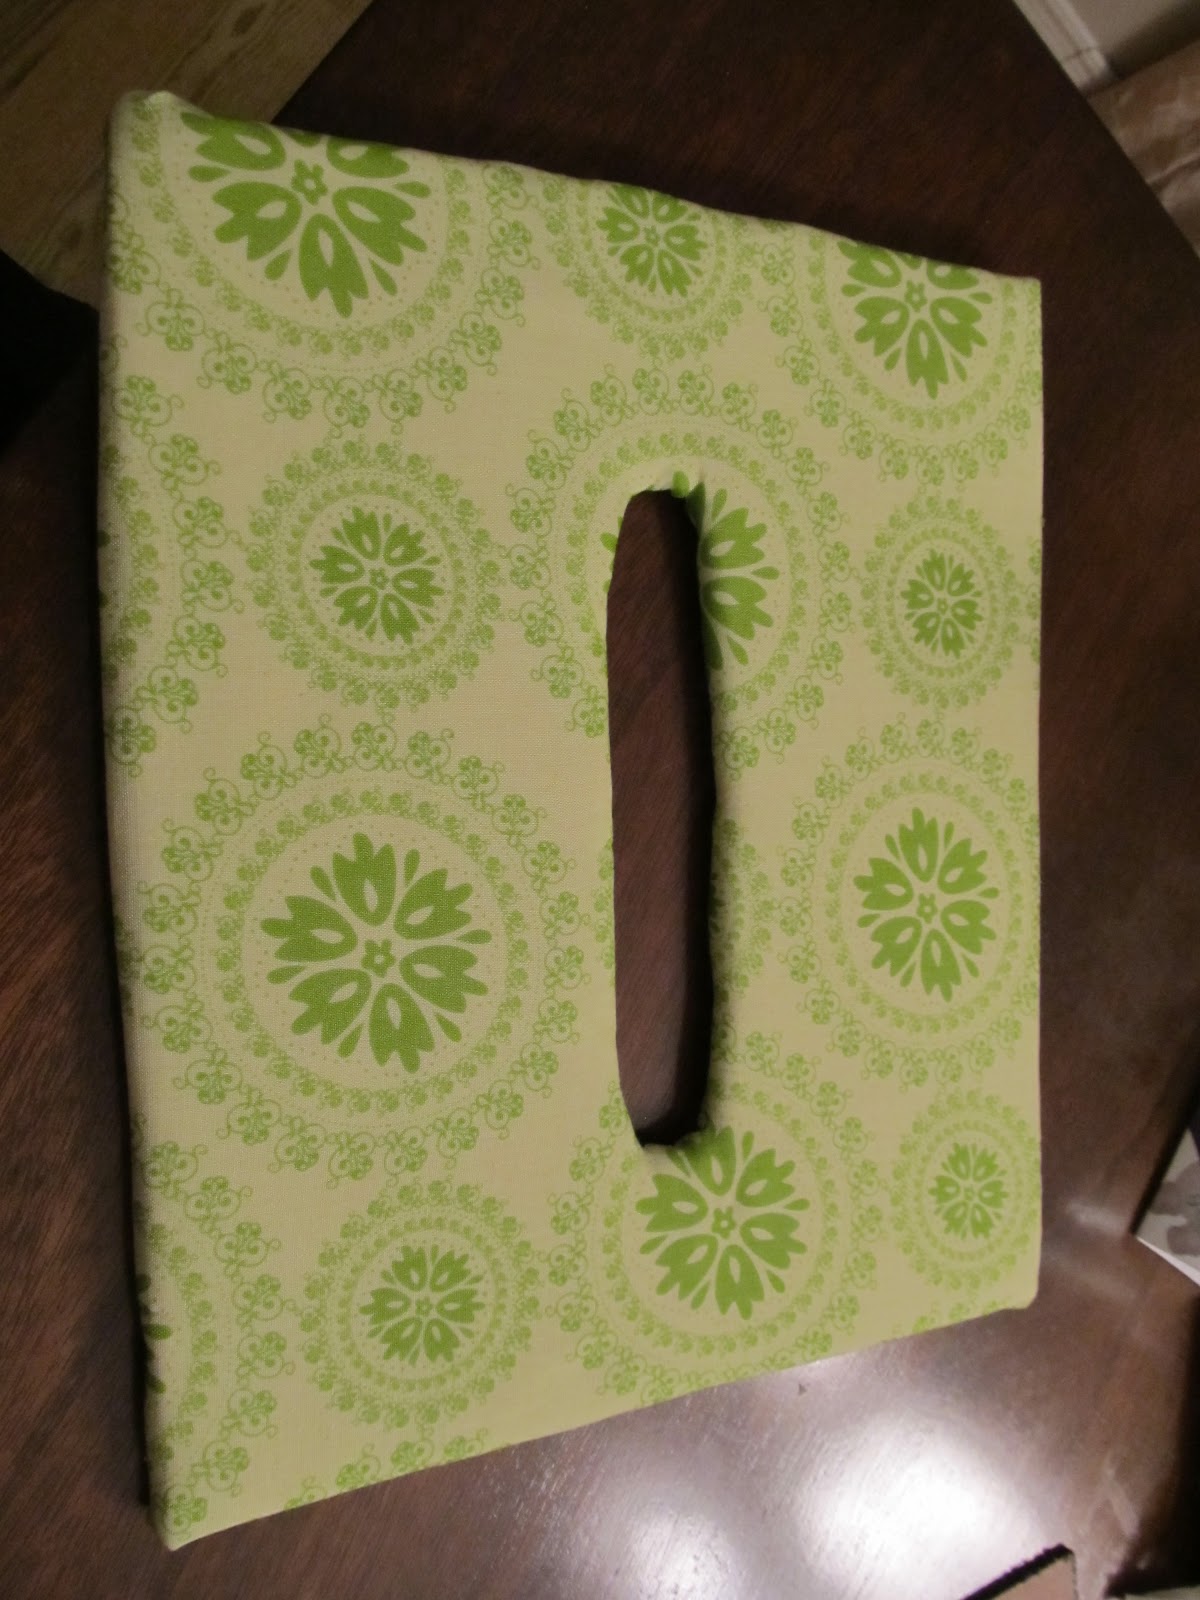
7. Measure a similarly sized piece of foam core to make the top of the box. It will need to be a tiny bit smaller to account for the added bulk of the felt and fabric. The sheets of felt I used didn't cover the long sides of my top but depending on the size of your box it might. Make sure to cut out a hole for the cards to go through; big enough for an envelope but not big enough for hands!

8. Cover the lid with two sheets of felt and staple it to the back, cutting a line through the card opening to bring the felt in around the opening as well.


9. Repeat that step with your fabric. I suggest cutting a little triangle at each end when you're cutting the line through the card slot (so it looks like this |>------------<|) That will make it easier to staple the fabric to the underside without ripping it.

10. Iron the whole board to get any lines out of your fabric. You could do this before upholstering the top, but I didn't think of that at the time! =D
11. Pop it on top and enjoy your new cardbox!! I'm going to stick the lid down the brackets inside with some more of the sticky tabs just to keep it securely on top and discourage any possible theives!


No comments:
Post a Comment